How to Install Acoustic Wood Slat Wall Panels at Home?
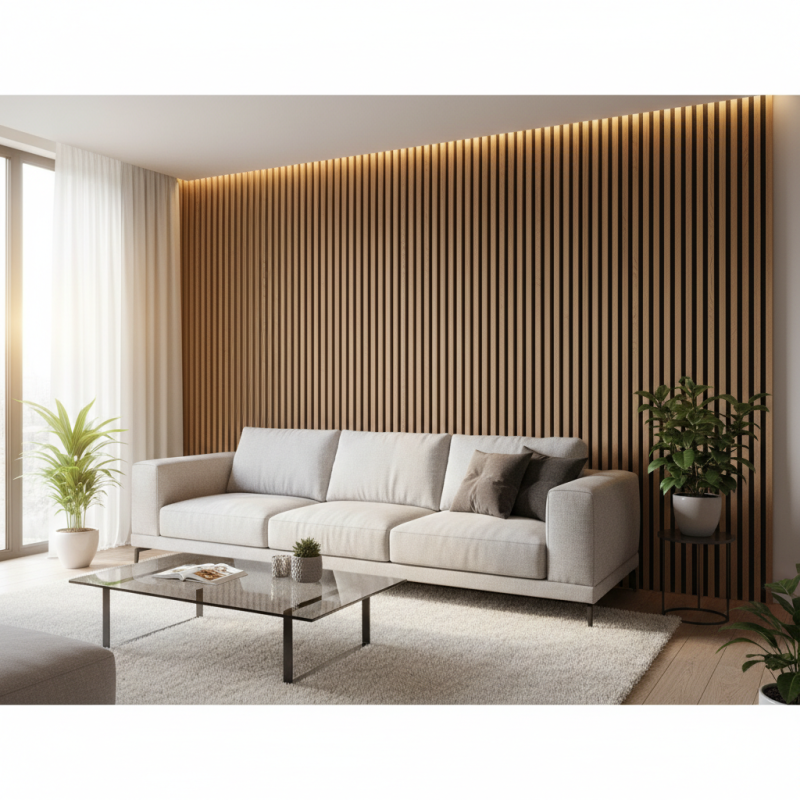
Installing an Acoustic Wood Slat Wall can transform your living space. This elegant solution enhances aesthetics while improving sound quality. According to a report by the Sound Association, over 70% of homeowners desire better acoustics in their homes. Acoustic Wood Slat Walls effectively address this need.
John Harmon, an acoustic design expert, states, “The right wood slat design not only absorbs noise but adds character to any room.” The ability to blend functionality with style makes this method appealing. Yet, many overlook the importance of installation techniques. Poor fitting can lead to gaps, reducing effectiveness.
Achieving the perfect balance in acoustics requires careful planning. Not all wood slats are created equal; selecting the right material is crucial. Installation may seem straightforward, but even small mistakes can lead to significant issues. Homeowners must be prepared to invest time and effort into getting it just right.
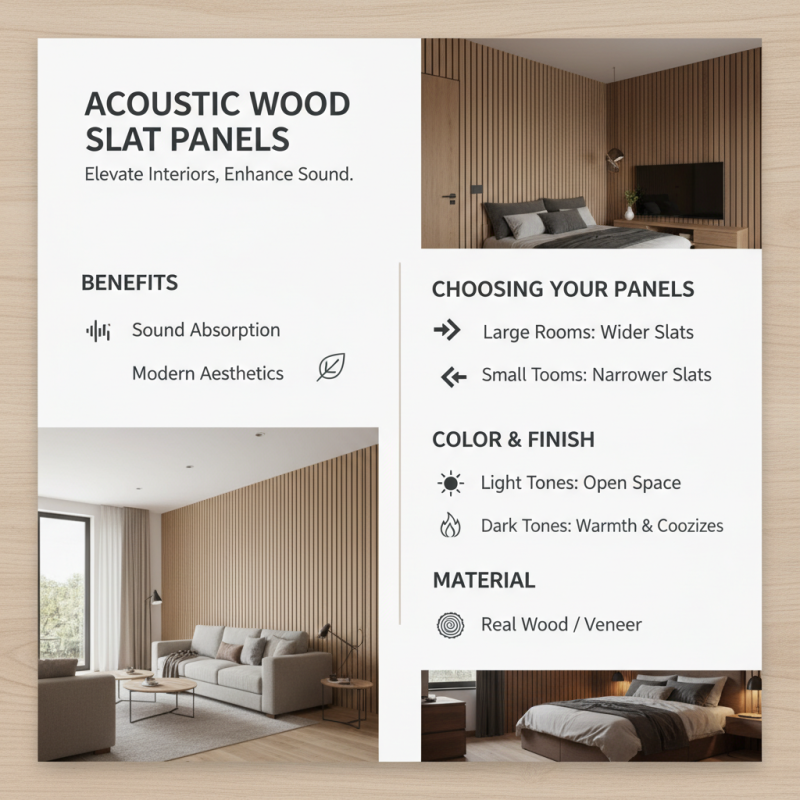
Choosing the Right Acoustic Wood Slat Wall Panels for Your Space
Choosing acoustic wood slat wall panels can elevate your interior while improving sound quality. Consider the size of your space. Large rooms may benefit from wider slats. Smaller spaces often look better with narrower panels. The color and finish are equally important. Light shades open up a room, while dark tones create warmth and coziness.
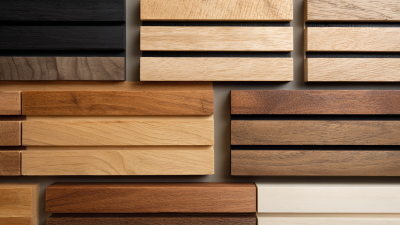
When selecting, think about the material too. Real wood offers a rich aesthetic. However, composite options might fit tighter budgets. Also, the thickness of the slats affects sound absorption. Thicker panels tend to reduce noise better. Texture adds character; smooth finishes are sleek, while rougher surfaces lend an organic feel.
**Tips:** Measure your walls before purchasing. This step ensures you buy enough panels. It's wise to view samples in different light settings. The color may change based on the time of day. Finally, don’t be afraid to mix styles. Sometimes imperfection sparks creativity. Embrace the unique character each selection brings to your space.
Preparing Your Walls for Acoustic Wood Slat Installation
Preparing your walls for acoustic wood slat installation is crucial for a professional finish. Start by clearing the wall area. Remove any existing decorations, nails, or furniture nearby. This gives you a clean slate to work on. Clean the surface to ensure good adhesion.
Next, assess the wall's condition. Look for cracks or holes that need repairs. Fill any gaps with spackling paste and sand it smooth. This step may take time and might not be perfect. However, don’t rush it. The smoother the wall, the better the installation will look.
Tips: Measure the wall accurately. Use a level to mark placement lines. This helps in aligning the panels properly. Consider using a stud finder. It helps in securing the panels firmly.
Once your walls are ready, gather your materials. You’ll need adhesive, tools, and, of course, the slats. Take care to follow instructions closely. Allow for adjustments during installation. Mistakes can happen, and learning from them is important.
Step-by-Step Installation Process for Wood Slat Panels
To install acoustic wood slat wall panels, start by gathering all necessary tools. You will need a measuring tape, level, saw, screws, and adhesive. Measure your wall area carefully. Cut the slats to the desired length. This step is crucial for a neat finish. If not measured accurately, you might end up with uneven gaps.
Begin the installation from one side of the wall. Use a level to ensure each slat is straight. If misaligned, it can affect the overall look. Applying adhesive can help secure each slat. For better results, use screws in addition. Adhesive alone may not hold as tightly as needed over time.
Tips: Ensure the wall surface is clean. Dust or debris can prevent adhesive from sticking properly. Also, consider using a stud finder. This device helps locate the best spots to secure your panels. Adjusting your plan midway can lead to better alignment. Don't hesitate to rethink your approach if something doesn’t look right.
Finishing Touches: Painting and Sealing Your Wood Slat Wall
When applying the finishing touches to your acoustic wood slat wall, painting and sealing are essential steps. On average, untreated wood absorbs moisture at a rate of about 12%, which can lead to warping or damage over time. Choosing the right sealant can mitigate this risk. A high-quality sealant can reduce moisture absorption by up to 50%. This significantly prolongs the life of your wooden panels.
Color selection affects both aesthetics and function. Neutral tones can create an open, airy feel, while darker hues add warmth. Many homeowners opt for satin finishes, which offer a balance between sheen and durability. Unlike gloss finishes, satin does not highlight imperfections. However, it’s crucial to remember that not all paints adhere well to sealed surfaces. A primer may be necessary to ensure optimal paint adhesion.
Once painted, allow adequate drying time. Environmental factors like humidity can impact drying rates. According to industry studies, a humidity level above 70% can extend drying times significantly. After your paint cures, consider adding a second layer of sealant. This will further protect the finish without compromising the natural beauty of wood. Remember, each step requires careful consideration. Rushing may lead to uneven layers and a subpar finish. Take your time to achieve the desired look.
Maintenance Tips for Long-Lasting Acoustic Wood Slat Panels
Maintaining acoustic wood slat panels is essential for their longevity.
Regular dusting is a good start. Using a soft cloth will keep them looking fresh.
For deeper cleaning, a mild soap solution works well.
Avoid harsh chemicals as they can damage the finish. A gentle touch goes a long way.
Humidity levels can affect wood panels. It's vital to monitor your indoor environment.
Using a humidifier in dry months is recommended. Conversely, in humid seasons, consider dehumidifiers to prevent warping.
A balanced atmosphere ensures the wood stays intact and beautiful.
Inspecting the panels regularly is another crucial step. Look for scratches or dents.
Addressing these promptly helps maintain aesthetic appeal. Applying a protective finish occasionally can enhance durability.
Don't neglect the edges; they can wear down faster. Care is key to enjoying your panels for years.