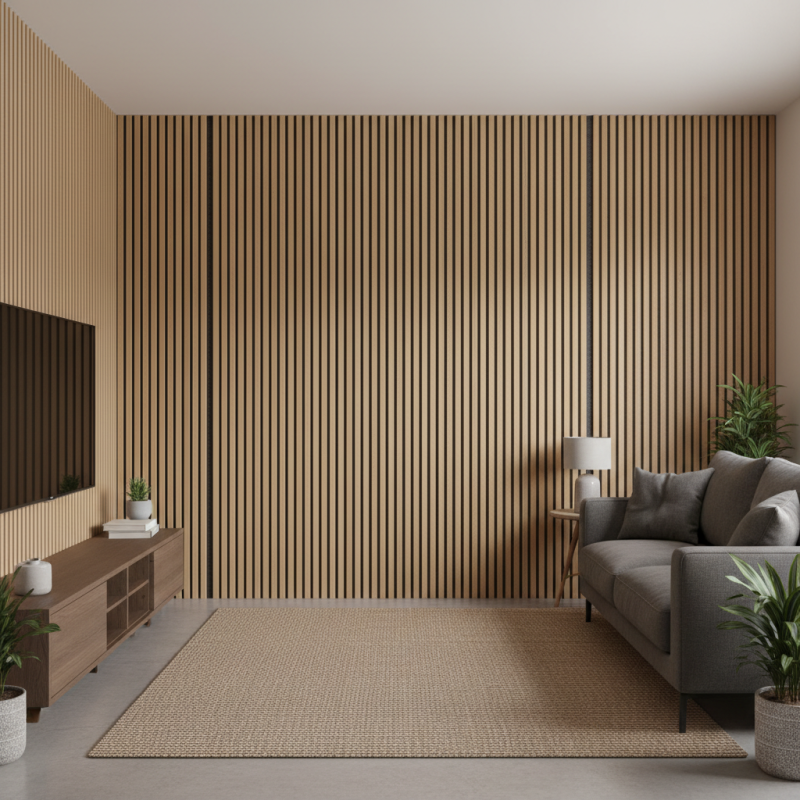
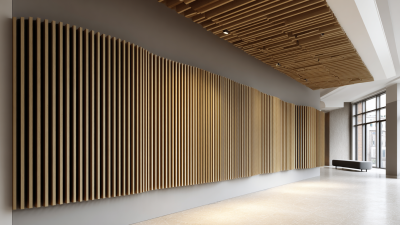
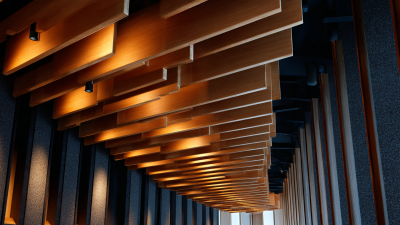
When it comes to optimizing sound quality within a space, the choice of wall treatments can make a significant difference. One innovative approach gaining popularity is the installation of an Acoustic Wood Slat Wall. This design not only enhances the acoustic properties of a room, making it conducive for music, speaking engagements, or quiet reflection, but it also adds an aesthetic appeal that complements various interior themes. The blend of natural wood materials with sound-absorbing qualities creates a harmonious balance between functionality and visual appeal.
Implementing an Acoustic Wood Slat Wall can transform a standard room into a sophisticated environment. The slats' arrangement and spacing play a crucial role in how sound waves are absorbed or reflected, effectively reducing echo and enhancing clarity. As sound travels in waves, having a wall configured in this way enables the management of noise levels and overall sound quality. This guide will take you through the essential steps to install an Acoustic Wood Slat Wall, ensuring you achieve both beautiful design and improved auditory experience in your space. Whether for a home theater, a recording studio, or a stylish living area, the right installation can lead to profound improvements in sound dynamics and ambiance.
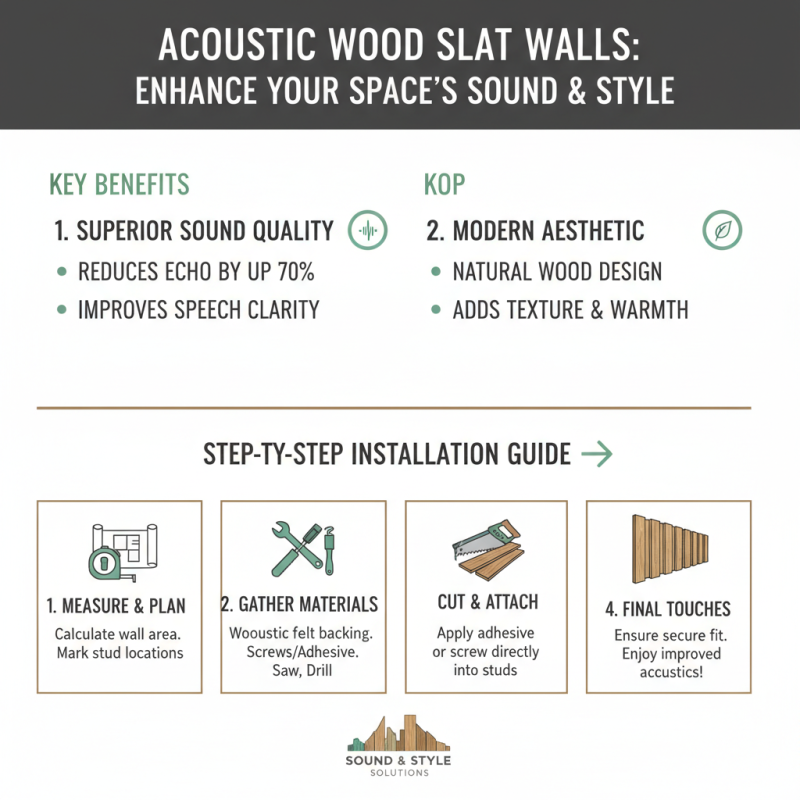
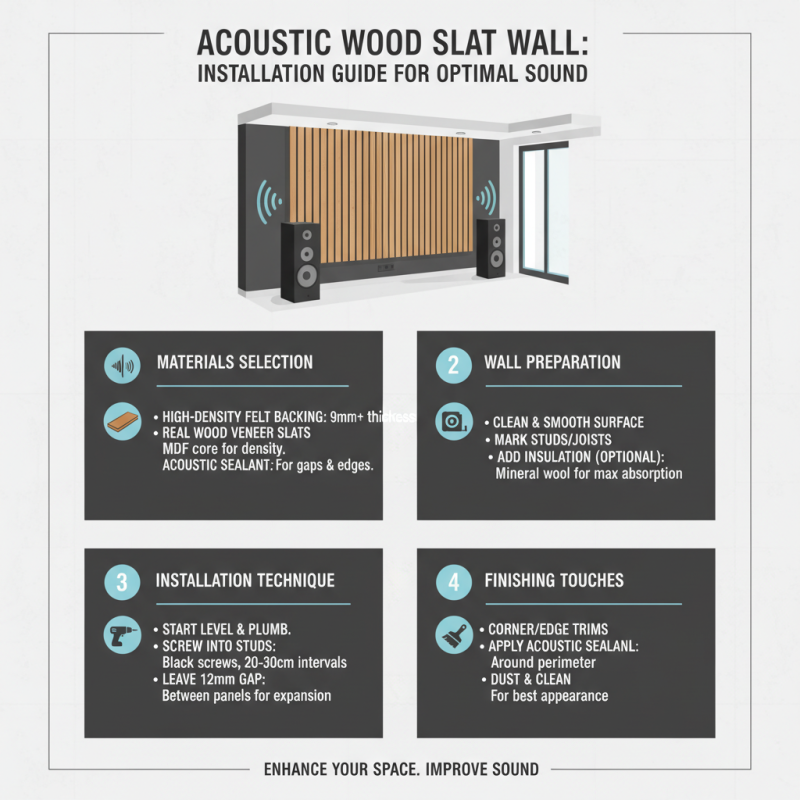
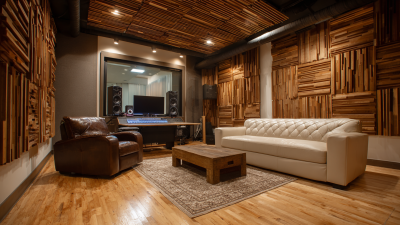
Acoustic wood slat walls have gained popularity in both residential and commercial spaces, primarily for their ability to improve sound quality. These walls not only serve an aesthetic purpose but also function as effective sound absorbers. According to a study published by the Acoustical Society of America, incorporating acoustic panels can reduce noise levels by up to 35 decibels, significantly enhancing speech clarity and overall auditory experience in any environment.
The benefits of acoustic wood slat walls extend beyond sound quality; they also contribute to a more comfortable atmosphere by reducing echo and reverberation. High-frequency sounds, which can be harsh in bare rooms, are effectively dampened by the slats. This is particularly beneficial in spaces such as music studios, conference rooms, and public venues where clear communication is essential. Furthermore, the natural beauty of wood fosters a warm and inviting ambiance, making these walls an ideal choice for both functionality and design.
Tips: When planning your acoustic wood slat wall installation, consider the spacing and orientation of the slats; wider gaps can offer more sound absorption at lower frequencies, while narrower gaps tend to target higher frequencies. Additionally, using a combination of different materials and textures can enhance the acoustic performance of the wall even further. Always ensure proper installation for optimal sound quality and aesthetic appeal.
When planning to install an acoustic wood slat wall, gathering the right materials is crucial for a successful project. Start by selecting high-quality wood slats, ideally made from dense, sound-dampening materials like oak or maple. These slats not only enhance the aesthetic appeal of your space but also improve sound quality by absorbing excess echo. Ensure each slat is cut to the desired length, typically ranging from 1 to 3 inches in width, to allow for flexible arrangements and designs.
In addition to wood slats, you will need sound-absorbing panels to place behind the slats. These can include foam or fabric-wrapped acoustic panels which will work together with the wood to reduce sound reflections effectively. Other essential materials include adhesive or nails for securing the slats to the wall, a level tool for precise alignment, and measuring tape for accurate spacing. A saw may also be needed for cutting slats to fit your specific wall dimensions. Lastly, consider having safety gear, such as goggles and gloves, on hand to ensure personal safety throughout the installation process.
| Material | Description | Quantity | Estimated Cost |
|---|---|---|---|
| Wood Slats | Acoustic wood slats for wall installation | 30 pieces | $300 |
| Adhesive | Strong adhesive for mounting slats | 2 tubes | $20 |
| Sound Insulation Panel | Panels to enhance sound quality | 5 panels | $100 |
| Mounting Brackets | Brackets for securing the slats | 10 pieces | $25 |
| Tools | Basic tools such as a level and saw | 1 set | $50 |
Installing acoustic wood slat walls can significantly enhance sound quality in various environments, from commercial spaces to home theaters. This step-by-step guide will walk you through the installation process, allowing you to enjoy the aesthetic of natural wood while reaping the acoustic benefits. Research indicates that effective acoustic treatment can reduce echo by up to 70%, making such installations ideal for spaces that require clear sound transmission and minimal reverberation.
To begin the installation, you will need to prepare your wall surface. Start by cleaning the area and ensuring it’s smooth and dry. Measure the desired height and width for the slat panels, considering that the optimal spacing between slats can vary; a 1 to 3-inch gap is often recommended for effective sound absorption. According to industry studies, wood slats can improve mid to high-frequency absorption, which is crucial for creating an overall balanced acoustic environment. Next, securely attach mounting strips to your wall, followed by the wood slats themselves. Use a level to ensure each slat is aligned correctly, enhancing not just sound quality but also the visual appeal of your space.
After the slats are installed, consider adding a backing material such as fabric or acoustic panels to further absorb sound waves. This can increase the overall effectiveness of your acoustic treatment and is recommended in several architectural acoustics reports. Depending on the thickness and material used, you can achieve up to 90% sound absorption in specific frequency ranges. Completing your wood slat wall installation with these considerations will not only elevate your sound experience but also contribute to the aesthetic richness of your environment.
Installing an acoustic wood slat wall can significantly enhance the sound quality in your space, creating a more enjoyable environment for both work and leisure. To ensure you achieve the best results, it's essential to focus on several key factors during the installation process.
One of the critical tips for optimal sound quality is to consider the placement of the slat wall. Position it in areas where sound tends to bounce, such as against hard surfaces like concrete walls or large windows. Additionally, altering the wall's height and angle can further improve sound absorption, helping to filter out unwanted noises. It’s also beneficial to use a mix of different slat widths and spacing to create a varied acoustic profile, which can contribute to richer sound texture.
Another important tip is to properly address the backing material. Choosing the right acoustical insulation behind the slats can significantly enhance sound absorption. Materials such as fiberglass or acoustic foam can reduce echo and control sound waves more effectively than standard insulation. Don’t forget to seal any gaps around the edges of your installation to prevent sound leakage, ensuring a more cohesive and soundproof environment.
To ensure the longevity and optimal performance of your acoustic wood slat wall, regular maintenance is crucial. Begin by dusting the slats with a soft, dry cloth or a feather duster to remove any accumulated dust and debris. Avoid using harsh chemicals or cleaners that could damage the wood finish. Instead, opt for a gentle wood cleaner when necessary, applied with a soft cloth. Regular cleaning not only enhances the appearance of the slats but also ensures they continue to effectively absorb sound.
In addition to routine cleaning, check for any signs of wear or damage periodically. This includes examining the wood for scratches, dents, or loose panels. If you notice any imperfections, promptly address them to prevent further deterioration. In case of minor scratches, a wood touch-up pen can be used for quick fixes. For more significant damage, consider consulting a professional for repairs or refinishing. Proper care will keep your acoustic wood slat wall aesthetically pleasing while maintaining its sound-enhancing properties for years to come.

